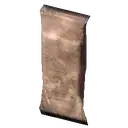
Where to get it
- Enemy loot
- Order Grunt ×0–1 (3%), Order Guard ×0–1 (3%), Order Captain ×0–1 (5%), Order Medic ×0–1 (3%), Order Breacher ×0–1 (3%), Order Sniper ×0–1 (3%), Groupe Mountaineer ×0–1 (2%), Groupe CQC ×0–1 (2%), Groupe Rook ×0–1 (2%), Order Trooper ×0–1 (2%), Order Shock Trooper ×0–1 (2%), Order Opprimo ×0–1 (2%), Order Guard (Off Duty) ×0–1 (3%)
- World
- Flathill: MRE; Manufacturing West: MRE ×13; Cascade Laboratories: MRE ×3; +5 more sectors. All locations
Percentages are the drop chance per container, enemy or salvage from the game's loot tables.
When consumed
Hunger +30Sanity +2Eat time 3s
Crafted from
Not craftable.
Used in

Where to find
- Flathill · 1 spot · MREShow on map →
- Manufacturing West · 13 spots · MRE ×13Show on map →
- Cascade Laboratories · 3 spots · MRE ×3Show on map →
- The Mycofields · 1 spot · MREShow on map →
- Hydroplant · 2 spots · MRE ×2Show on map →
- The Reactors · 10 spots · MRE ×10Show on map →
- The Praetorium · 11 spots · MRE ×11Show on map →
- Fragments · 3 spots · MRE ×3Show on map →
Sectors in story order. Spots are placed containers, furniture and salvage in the level files; the percentage is the chance each one holds this item. Find on the map
Best sectors to farm
- 1Manufacturing West · 13 spots≈13 per sweep
Map → - 2The Praetorium · 11 spots≈11 per sweep
Map → - 3The Reactors · 10 spots≈10 per sweep
Map → - 4Cascade Laboratories · 3 spots≈3 per sweep
Map → - 5Fragments · 3 spots≈3 per sweep
Map → - 6Hydroplant · 2 spots≈2 per sweep
Map →
Expected copies from opening or breaking every placed source once: each spot's drop chance times its average quantity, added up. Enemy drops and traders not included.
Repair with
 Metal Scrap×1